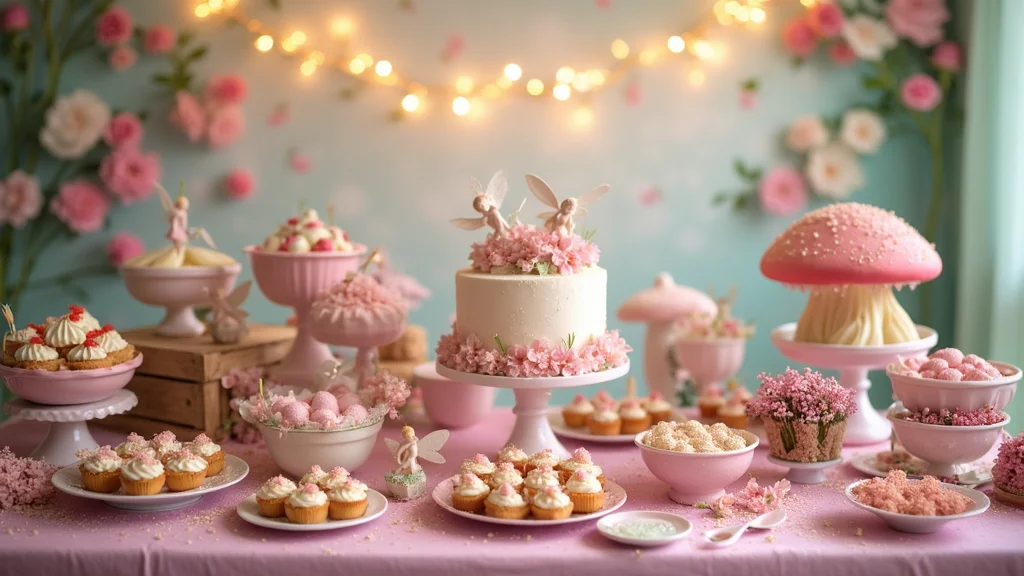
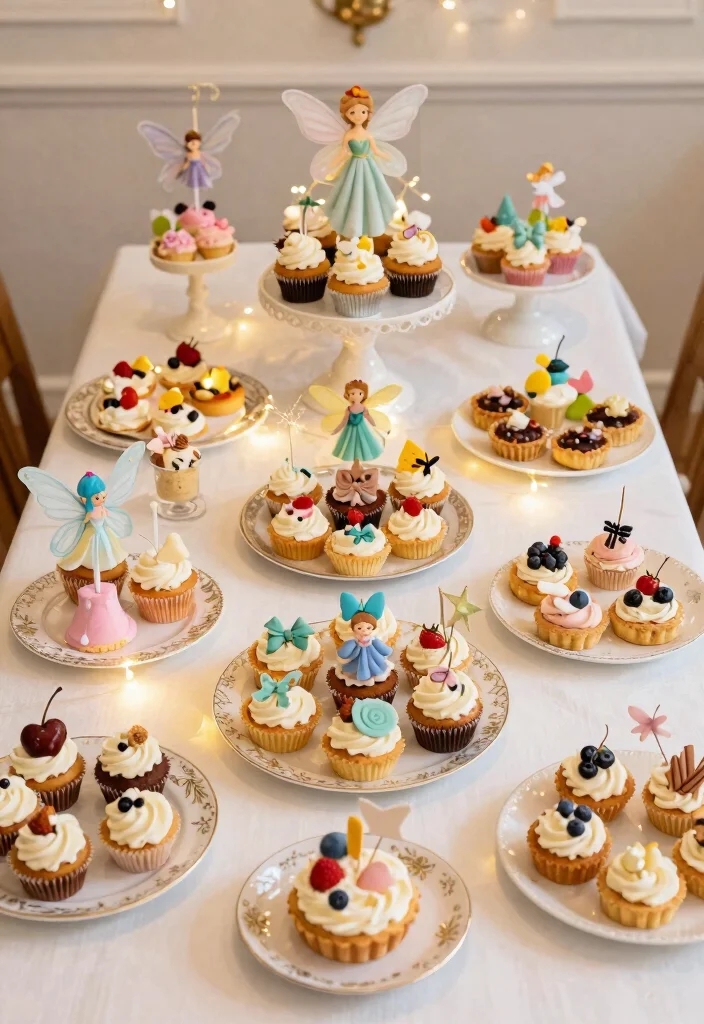
Are you ready to sprinkle a little magic on your birthday party? Birthdays are a time for celebration, joy, and most importantly, delicious treats! I created this post because I believe that every birthday deserves enchanting fairy themed desserts that make everyone feel like they’ve stepped into a whimsical kingdom. If you’re looking for delightful ways to add some sparkle to your special day, this one’s for you.
This collection of 25 enchanting fairy themed desserts will captivate both kids and adults alike, evoking memories of fairy tales and magical adventures. Whether you’re a parent planning a birthday bash or a friend trying to surprise someone special, you’ll find that these whimsical treats are not just visually stunning, but also incredibly delicious. Imagine cupcakes topped with glittering fairy dust, fruit wands that are as tasty as they are fun, and dreamy jello cups that will have everyone swooning. You’ll be equipped with all the ideas you need to transform your party into a magical experience.
Each recipe is designed to inspire creativity and bring a touch of fantasy to your celebration. From cupcakes to cookies, you’ll discover an array of treats that are easy to make and guaranteed to impress. Get ready to dive into this delightful world of fairy desserts that will make your birthday party truly shine!
Key Takeaways
– Discover a variety of 25 enchanting fairy themed desserts that add magic to any birthday party.
– Enjoy easy-to-follow recipes that appeal to both kids and adults, ensuring everyone has a great time.
– Learn how to incorporate whimsical elements into your treats, making them visually stunning and fun.
– Find practical tips for presenting and serving these desserts to maximize their magical appeal.
– Create lasting memories by making your birthday celebration extra special with these delightful recipes.
How To Choose The Right Fairy Themed Dessert
When planning your magical birthday party, selecting the right fairy themed desserts can set the tone for the whole event. Here are some tips to help you choose:
1. Consider the Theme: Think about your overall party theme. Are you going for a classic fairy tale? Or perhaps a modern twist? Match your desserts to the chosen vibe for coherence.
2. Age Appropriateness: Make sure the desserts are suitable for your guests’ age groups. Younger kids may enjoy fun shapes and flavors, while adults might appreciate sophisticated presentations.
3. Dietary Restrictions: Check if any of your guests have dietary restrictions like allergies or specific diets. Offering a variety of options, including gluten-free or nut-free desserts, ensures everyone can indulge.
4. Presentation Matters: Choose desserts that are visually appealing and can be showcased beautifully. Think about colors, decorations, and how they fit into the fairy theme.
5. Easy to Serve: Select desserts that are simple to serve and eat. Finger foods or cupcakes are great because they allow guests to munch and mingle without needing a full plate.
Pro Tip: Prepare a mix of desserts that range from simple to more complex, giving your guests a delightful surprise and variety!
How Do Fairy Themed Desserts Work?
Creating fairy themed desserts is all about blending flavors, colors, and creativity. Here’s how you can make these magical treats come to life:
1. Choose Your Base: Start with a solid base for your dessert, whether it’s cupcakes, cookies, or cakes. This is your canvas.
2. Add Flavor Profiles: Incorporate flavors that are fun and festive. Think about fruity, chocolatey, or even floral notes for a whimsical touch.
3. Decorate with Flair: Use edible glitter, colorful sprinkles, or themed decorations to make your desserts visually enchanting.
4. Embrace Creativity: Don’t be afraid to experiment with shapes and colors. Use cookie cutters or molds to create fairy-like designs.
Best for: Anyone looking to impress guests with stunning and delicious fairy themed desserts that spark joy!
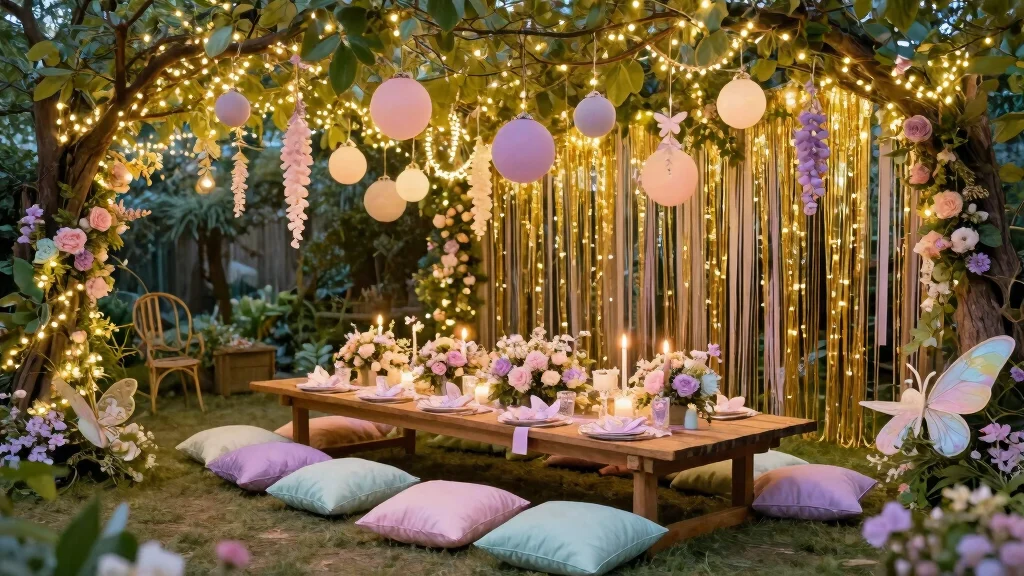
How To Present Fairy Themed Desserts
Presentation is key when it comes to fairy themed desserts. Here’s how to make your treats look as magical as they taste:
Tools You’ll Need:
– Decorative platters
– Small cake stands
– Edible glitter or sprinkles
– Colorful napkins
– Fairy lights (if desired)
Step 1: Choose Your Platters: Select lovely platters or stands that suit your fairy theme. Light colors or whimsical designs work best.
Step 2: Layer Your Desserts: Create height by arranging desserts in layers. Use cupcake stands or tiered platters to draw the eye.
Step 3: Add Decorative Touches: Sprinkle edible glitter or place decorative elements like flowers or stars around your desserts for an enchanting look.
Step 4: Incorporate Lighting: If possible, use fairy lights to illuminate your dessert table. This adds an ethereal glow that emphasizes the magic of your treats.
Step 5: Label Each Dessert: Use cute labels or tags for each dessert. This not only informs guests but adds an extra special touch.
⏱ Time: ~30 minutes | 💡 Tip: Consider using themed cupcake liners or wrappers for an added touch of magic!
With these ideas and guidelines, you’re all set to create a spectacular fairy themed birthday celebration filled with enchanting desserts. Let the magic begin!
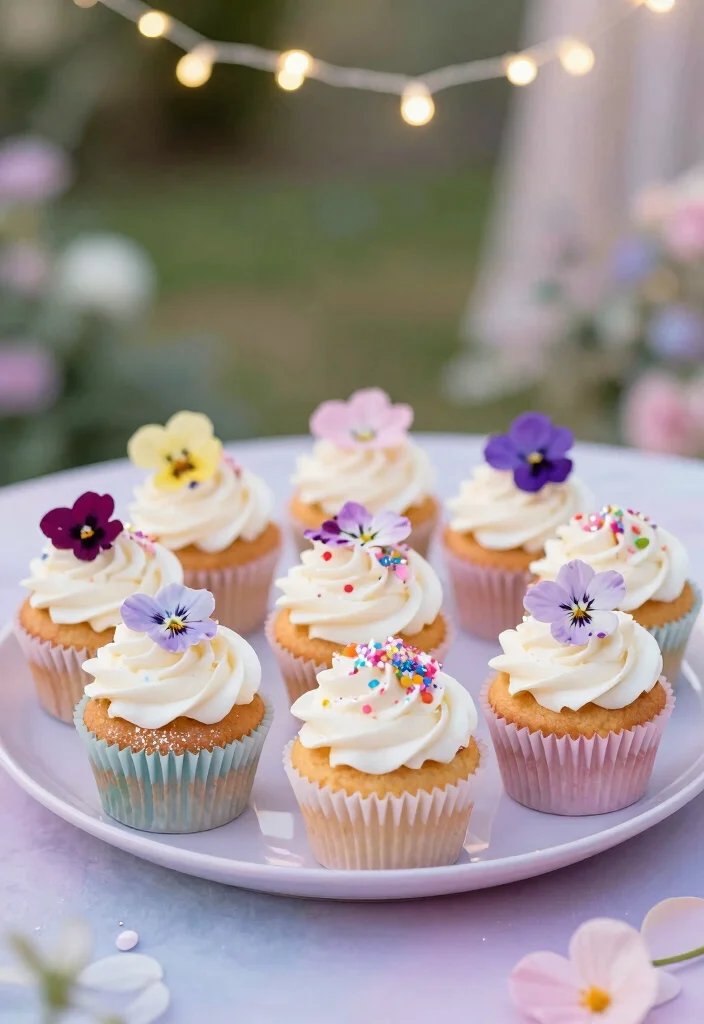
1. Sparkling Fairy Cupcakes
Looking to dazzle your guests with something sweet? These sparkling fairy cupcakes are a feast for the eyes and the taste buds! With fluffy vanilla frosting and a sprinkle of edible glitter, they bring a magical touch to your fairy-themed celebration while delivering a delightful taste experience with every bite. Plus, they’re simple to create at home, making them a perfect party treat.
Ingredients: – 1 ½ cups all-purpose flour – 1 tsp baking powder – ½ tsp baking soda – ½ tsp salt – ½ cup unsalted butter, softened – 1 cup granulated sugar – 2 eggs – 1 tsp vanilla extract – ½ cup milk (dairy or plant-based) – Edible glitter for decoration.
Instructions: 1. Preheat your oven to 350°F (175°C) and line a cupcake pan with liners. 2. In a bowl, mix flour, baking powder, baking soda, and salt. 3. In another bowl, cream together butter and sugar until light and fluffy. Add eggs one at a time, mixing well. 4. Stir in vanilla. 5. Gradually add the dry ingredients and milk alternately, beating until just combined. 6. Divide the batter into bowls, color each portion with food coloring, and create a fun rainbow effect. 7. Fill cupcake liners ¾ full with batter and bake for 15 minutes. 8. Let cool completely before frosting with vanilla frosting and sprinkling edible glitter on top.
FAQs: – Can I make these gluten-free? Yes, substitute regular flour with gluten-free flour. – How can I store leftover cupcakes? Keep them in an airtight container for up to 3 days.
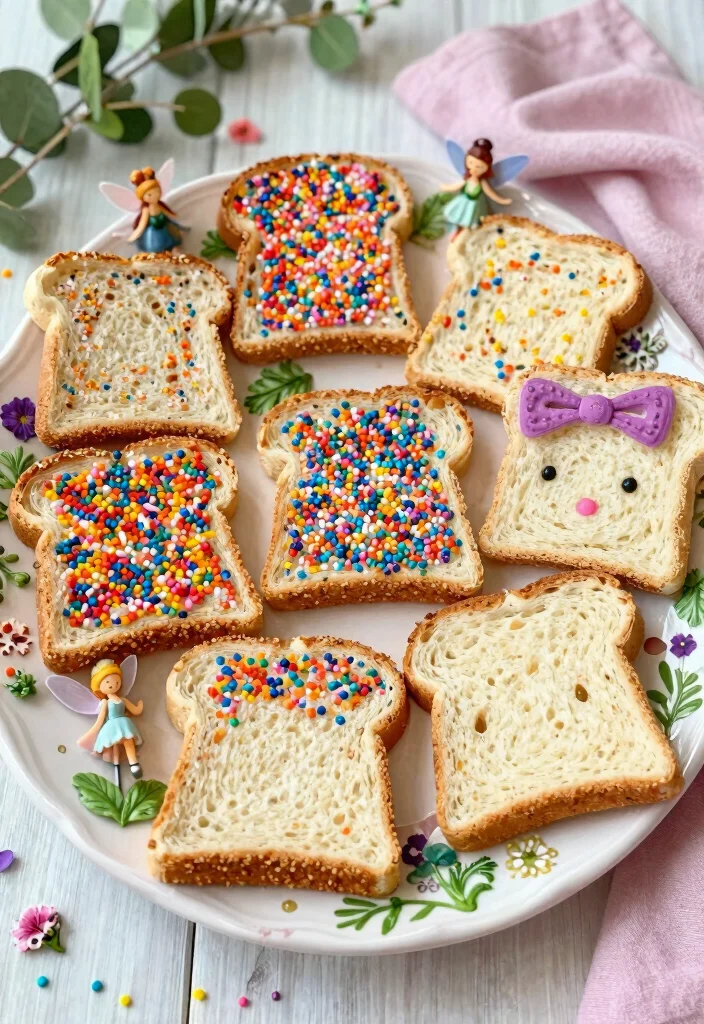
Craving a nostalgic treat that delights both kids and adults? Enchanted fairy bread is a whimsical take on a childhood classic! Just spread soft butter over white bread and sprinkle it with colorful sprinkles, creating a charming snack that’s as fun to eat as it is to look at.
Ingredients: – 10 slices of white bread – ½ cup softened butter – 1 cup colorful sprinkles.
Instructions: 1. Spread a thin layer of softened butter on each slice of bread. 2. Generously sprinkle colorful sprinkles over the buttered slices. 3. Cut the slices into triangles or fun shapes using cookie cutters. 4. Arrange them on a platter and serve immediately.
FAQs: – Can I use whole wheat bread? Absolutely! Whole wheat adds a nutty flavor.
Enchanted Fairy Bread
Editor’s Choice
Price updated on December 19, 2025 at 5:27 AM
🛍️
BAKERLOGY Set of 2 Cute Fairy and Fairy Door Cookie Cutter – Detailed Bi…
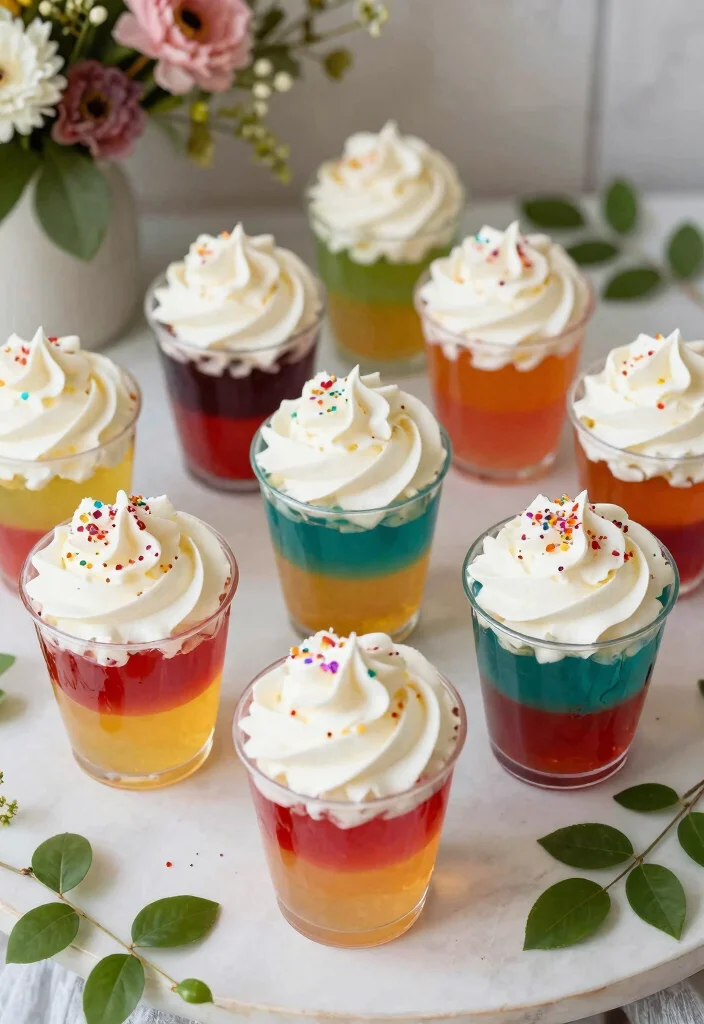
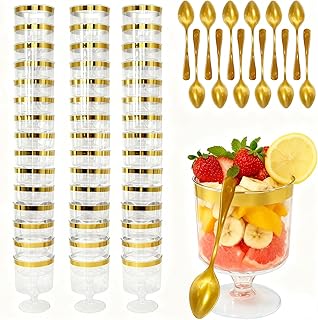
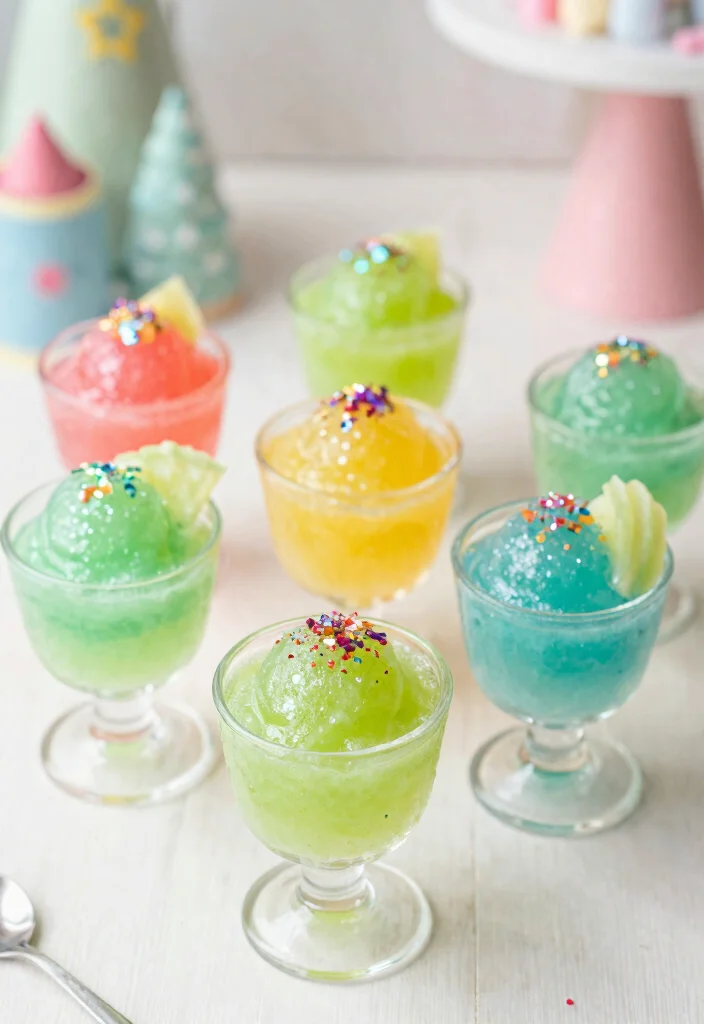
Want to add a splash of color to your party? Pixie potion jello cups are a playful, eye-catching treat! Layer different flavored jello in clear cups to create a magical rainbow effect that’s not only visually stunning but also a refreshing delight.
Ingredients: – 3 different flavored jello packs (like strawberry, lime, and blueberry) – 4 cups boiling water – 4 cups cold water – Whipped cream for topping – Edible glitter for garnish.
Instructions: 1. In separate bowls, dissolve each jello pack in 1 cup of boiling water until fully dissolved. 2. Add 1 cup of cold water to each bowl and mix well. 3. Pour the first layer of jello into cups and refrigerate until set (about 30 minutes). 4. Once set, repeat with the next jello layer, refrigerating again. 5. Continue until all colors are layered. Top with whipped cream and sprinkle edible glitter before serving.
FAQs: – Can I use sugar-free jello? Yes, that works too!
Pixie Potion Jello Cups
Editor’s Choice
Price updated on December 19, 2025 at 5:27 AM
🛍️
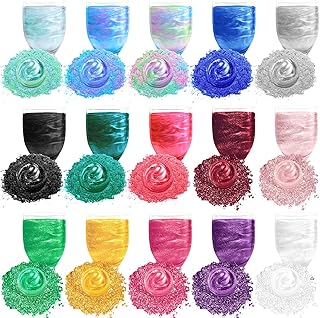
Edible Glitter – 15 Popular Colors Edible Glitter for Cocktails, Food Gr…
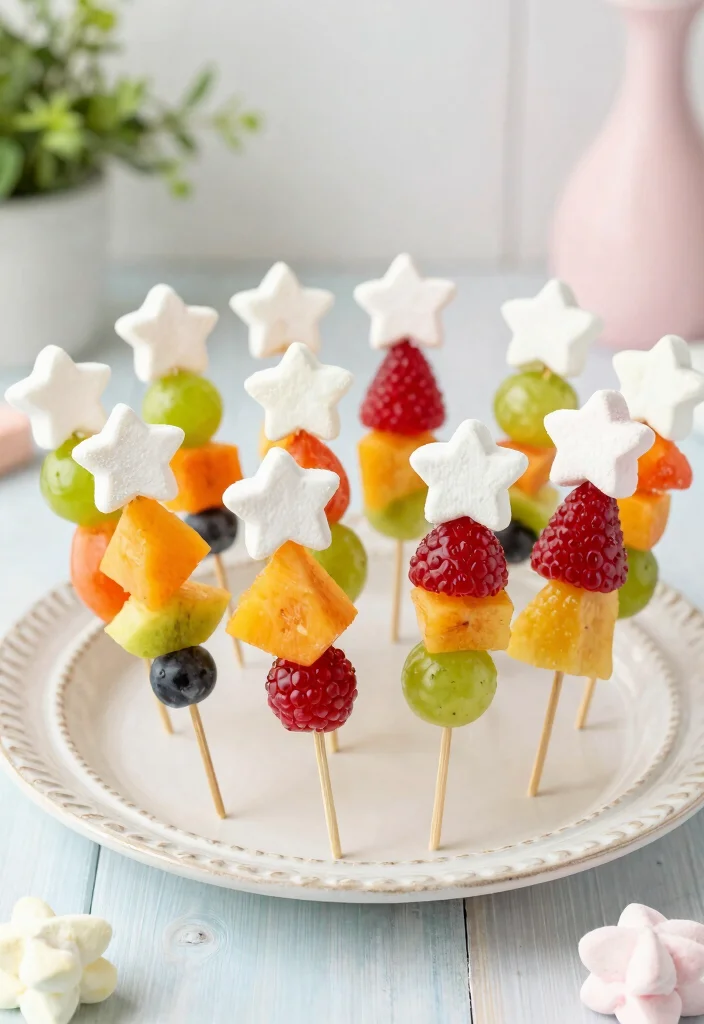
Looking for a healthy yet fun dessert? Fairy fruit wands combine vibrant fruit pieces on skewers, creating a delightful snack that’s both enchanting and nutritious. Add star-shaped marshmallows on top, and you have a treat that’s as enjoyable to eat as it is to look at!
Ingredients: – Assorted fruits (strawberries, blueberries, watermelon, and grapes) – Marshmallows (preferably star-shaped) – Skewers or lollipop sticks.
Instructions: 1. Wash and cut fruits into bite-sized pieces. 2. Thread a piece of fruit onto each skewer, adding a marshmallow, and alternate until filled. 3. Arrange the finished wands on a platter for display.
FAQs: – Can I use other fruits? Definitely! Use your favorites.
Fairy Fruit Wands
Editor’s Choice
Price updated on December 19, 2025 at 5:27 AM
🛍️
1,000 Pcs Green Bamboo Skewers 4.7″ Decorative Cocktail Picks, Appetizer…
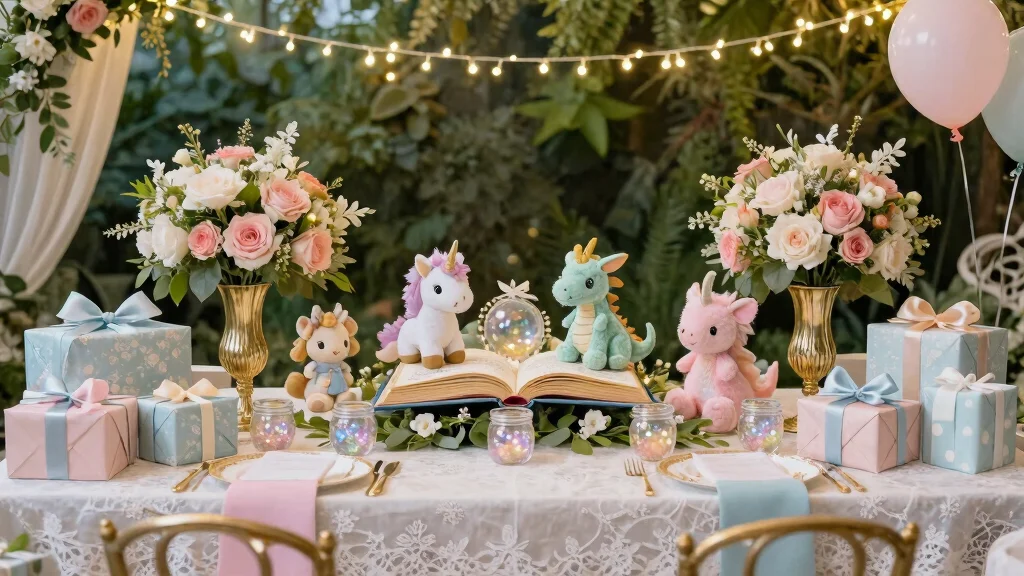
Want to wow your guests with a stunning centerpiece? These magical unicorn cakes are made with colorful sponge layers, each adorned with creamy frosting and edible glitter. Topped with a fondant unicorn horn, they’re both enchanting and delicious, making them the highlight of any celebration!
Instructions: 1. Preheat your oven to 350°F (175°C) and prepare cake pans. 2. Cream together butter and sugar until fluffy, then add eggs one by one. 3. Combine flour and milk, adding to the butter mixture. 4. Divide and color the batter with food coloring. 5. Bake for 30 minutes or until a toothpick comes clean. 6. Once cooled, stack the layers with frosting and cover with buttercream. 7. Decorate with edible glitter and add the fondant horn on top.
FAQs: – Can I use a box cake mix? Yes, it’s a great time-saver!
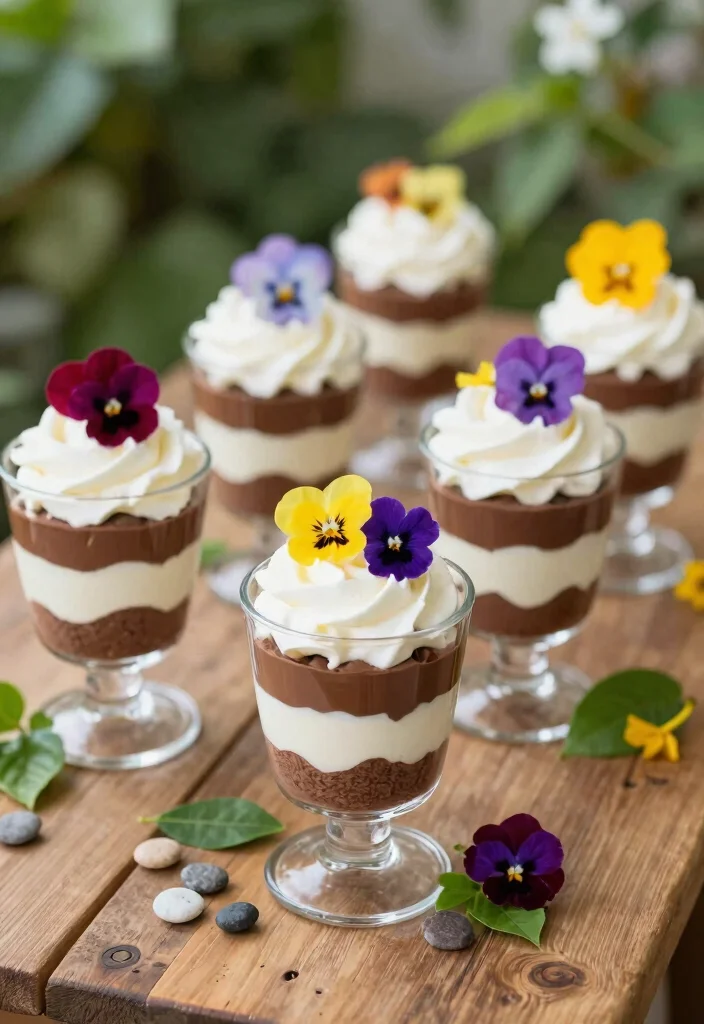
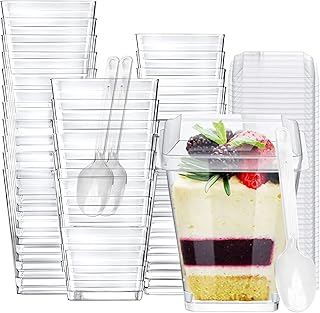
Craving something cute and tasty? Fairy garden pudding parfaits are a delightful way to bring a garden feel to your dessert table! Layer chocolate or vanilla pudding with crushed cookies and whipped cream, topped with edible flowers for a whimsical touch.
Instructions: 1. Prepare chocolate and vanilla pudding according to package instructions. 2. In clear cups, layer the chocolate pudding first, followed by crushed cookies, then vanilla pudding, and top with whipped cream. 3. Finish with edible flowers and a sprinkle of crushed cookies.
FAQs: – Can I use store-bought pudding? Of course! It saves a lot of time.
Fairy Garden Pudding Parfaits
Editor’s Choice
Price updated on December 19, 2025 at 5:28 AM
🛍️
Eupako 100 Pack 5 oz Square Clear Plastic Dessert Cups with Spoons Small…
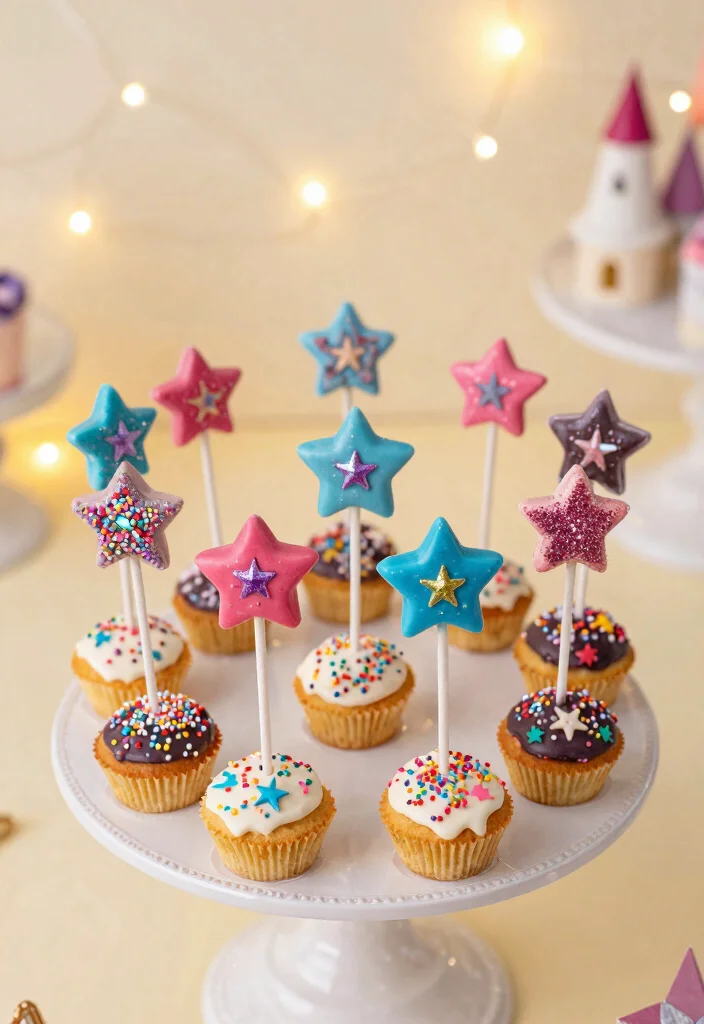
Looking for a fun and portable dessert option? Twinkling star cake pops are sure to be a hit at your party! Using a simple cake mix, you can create delicious cake balls dipped in colored candy melts, sprinkled with star-shaped decorations for an extra sparkle.
Instructions: 1. Bake cake according to package instructions and let cool. 2. Crumble cooled cake in a bowl, mixing in frosting until moldable. 3. Form small balls and place on a baking sheet. 4. Melt candy melts as per package instructions. 5. Dip each cake ball in the melted candy, sprinkling decorations immediately afterward. 6. Insert sticks and let them set on a cooling rack.
FAQs: – Can I use leftover cake? Yes, it works perfectly for this recipe!
Twinkling Star Cake Pops
Editor’s Choice
Price updated on December 19, 2025 at 5:28 AM
🛍️
Holstein Housewares 12-Count Cake Pop Maker with Non-Stick Plates & Indi…
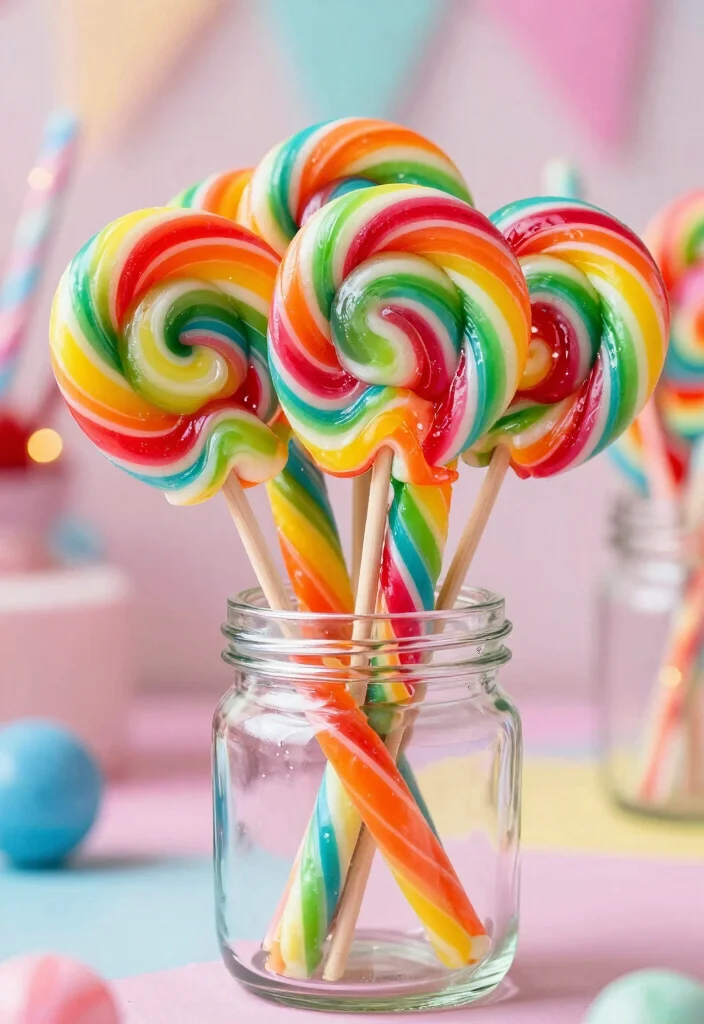
Want a chewy treat that adds color to your dessert table? Rainbow fairy licorice is a fun and colorful option! Layer different colors of licorice to create a beautiful rainbow effect, making it a delightful snack that your guests will love.
Ingredients: – 1 bag of assorted colored licorice (red, orange, yellow, green, blue, purple).
Instructions: 1. Open the bags of licorice and cut them into equal lengths. 2. Layer the different colored licorices in a clear glass jar to showcase their rainbow colors. 3. Serve with small cups for easy grabbing!
FAQs: – Can I use other candies? Sure! You can mix with sour belts for added variety.
Rainbow Fairy Licorice
Editor’s Choice
Price updated on December 19, 2025 at 5:28 AM
🛍️
Gustaf’s Rainbow Laces, 2lb Bulk Bags (Pack of 3), Fun Colorful Laces fo…
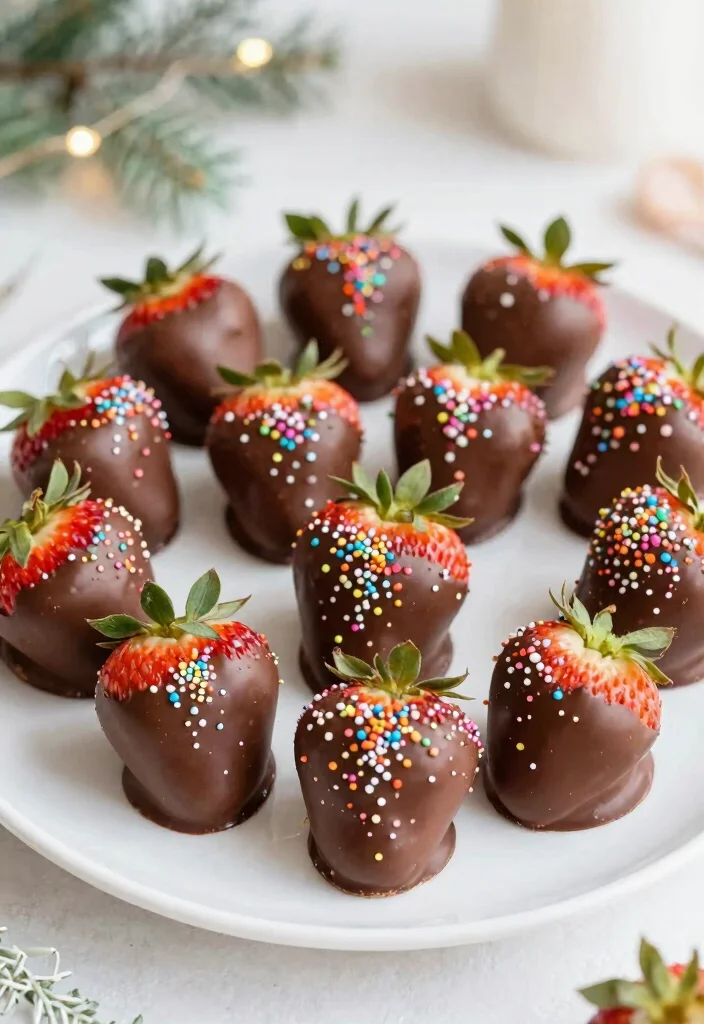
Looking to impress your guests with a luxurious treat? Dreamy chocolate-dipped strawberries are both easy to make and absolutely delicious! Dip fresh strawberries in melted chocolate and sprinkle them with edible glitter or colorful toppings for the perfect fairy-tale finish.
Ingredients: – 12 fresh strawberries – 1 cup chocolate (white or dark) – ½ cup colorful sprinkles or edible glitter.
Instructions: 1. Melt chocolate in a microwave-safe bowl at 30-second intervals until smooth. 2. Dip each strawberry into the melted chocolate, allowing excess to drip off. 3. Immediately sprinkle with edible glitter or toppings. 4. Place on parchment paper and let them set until the chocolate hardens.
FAQs: – How should I store them? Keep them in the refrigerator for up to 2 days.
Dreamy Chocolate Dipped Strawberries
Editor’s Choice
Price updated on December 19, 2025 at 5:28 AM
🛍️
Edible Glitter – 15 Popular Colors Edible Glitter for Cocktails, Food Gr…
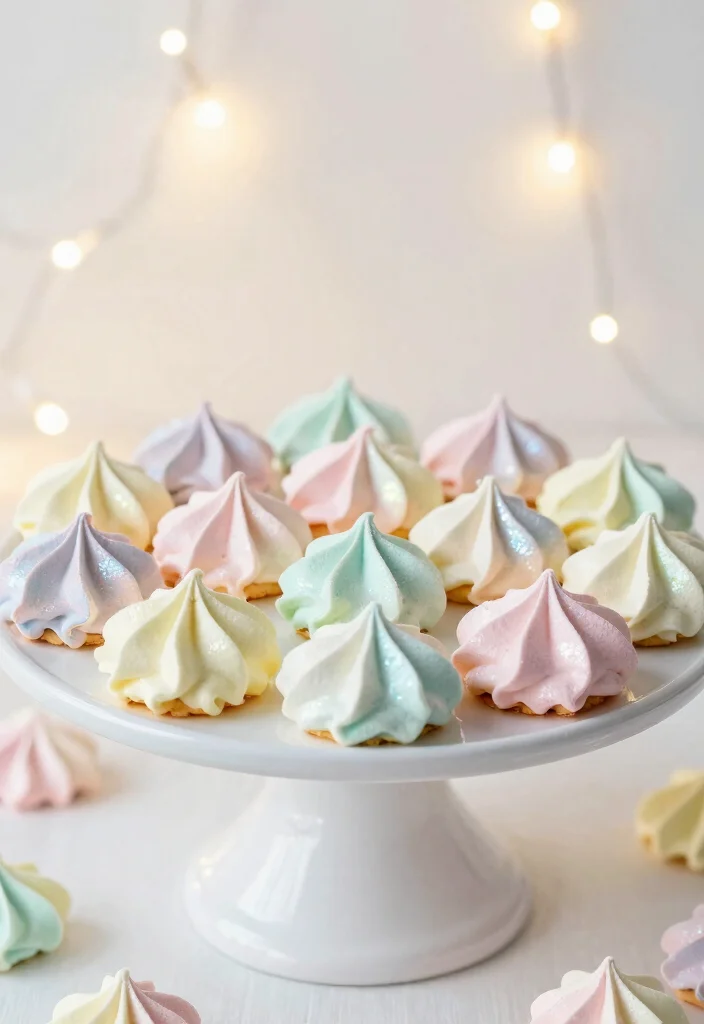
Searching for an airy, delightful addition to your dessert spread? Magical fairy meringue cookies are light and sweet, perfect for any fairy-themed party! Easily colored and piped into whimsical shapes, they melt in your mouth and pair perfectly with tea or stand alone as a treat.
Instructions: 1. Preheat your oven to 200°F (93°C) and line a baking sheet with parchment paper. 2. Beat egg whites until soft peaks form. 3. Gradually add sugar while continuing to beat until stiff peaks form and glossy. 4. Gently mix in vanilla and food coloring if using. 5. Pipe the mixture into shapes on the prepared sheet and bake for 1 hour. 6. Let cool in the oven for an additional hour.
FAQs: – Can I make these ahead of time? Yes, they can be stored in an airtight container for up to a week.
Did you know fairy themed desserts shine brightest when you bake at 200°F? Magical fairy meringue cookies puff up from just 4 egg whites and 1 cup of sugar, then melt in your mouth—perfect for whimsical party moments.
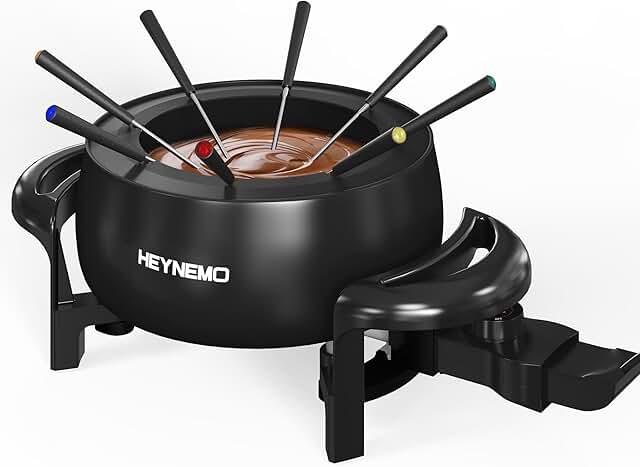
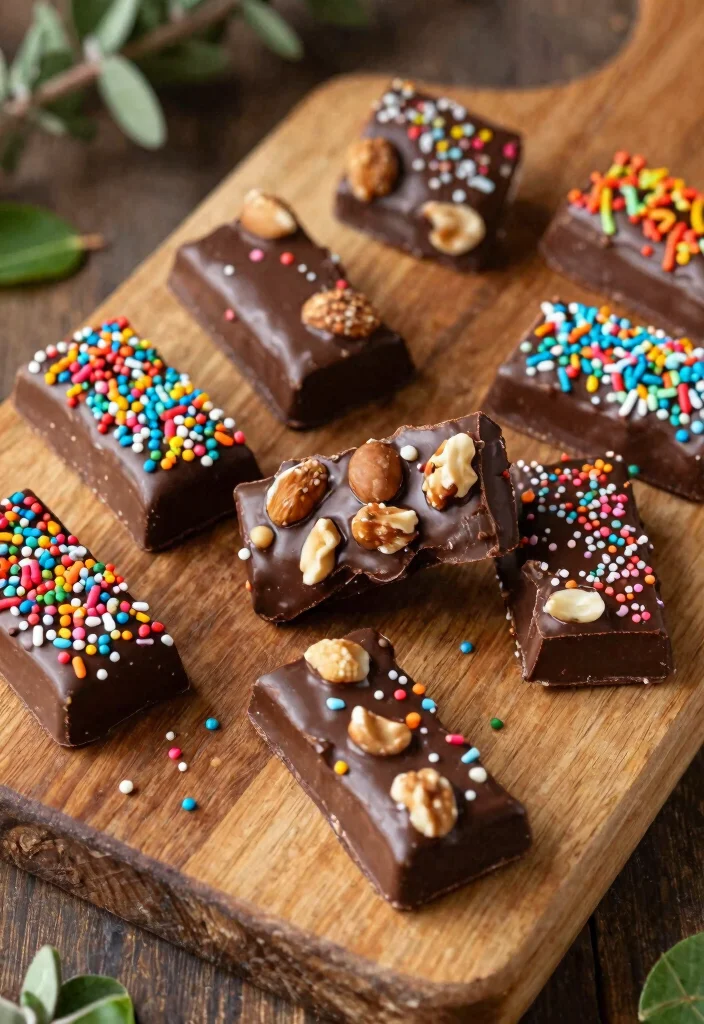
Want to create a magical treat with minimal effort? Enchanted chocolate bark is the perfect solution! Melt your choice of chocolate, spread it out, and top with colorful sprinkles and nuts for a stunning dessert that your guests will adore.
Ingredients: – 2 cups chocolate (dark or milk) – ½ cup assorted toppings (sprinkles, nuts, dried fruits).
Instructions: 1. Melt the chocolate in a microwave-safe bowl at 30-second intervals until smooth. 2. Spread the melted chocolate onto a parchment-lined baking sheet in a thin layer. 3. Sprinkle your choice of toppings over the melted chocolate and gently press them in. 4. Let it set in the refrigerator until hardened, then break into pieces.
FAQs: – How long does it last? Store in an airtight container for up to two weeks.
Enchanted Chocolate Bark
Editor’s Choice
Price updated on December 19, 2025 at 5:28 AM
🛍️
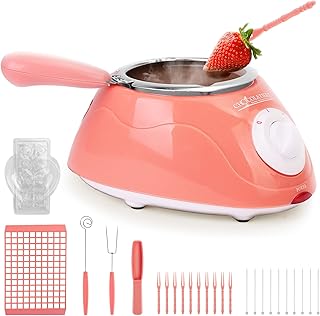
Chocolate Melting Pot, Electric Chocolate Melter Warmer Fondue Fountain …
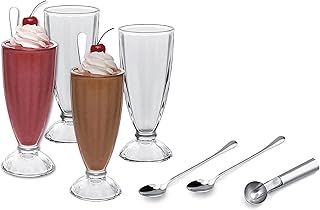
Craving something sweet and fluffy? Pixie fairy fluff is an easy-to-make dessert that’s sure to enchant! Combine whipped cream, marshmallows, and colorful candies in whimsical cups to create a light and airy treat that will delight your guests.
Ingredients: – 2 cups whipped cream – 1 cup mini marshmallows – 1 cup colorful candies (like M&Ms or jellybeans).
Instructions: 1. In a large bowl, combine whipped cream, mini marshmallows, and colorful candies. 2. Gently fold until evenly mixed. 3. Serve immediately in whimsical cups or glasses.
FAQs: – Can I make this ahead of time? It’s best served fresh, as the fluff may deflate.
Pixie Fairy Fluff
Editor’s Choice
Price updated on December 19, 2025 at 5:28 AM
🛍️
JIURUN 140Pcs Dessert Cups with Gold Spoons, 5oz Mini Clear Appetizer Pa…
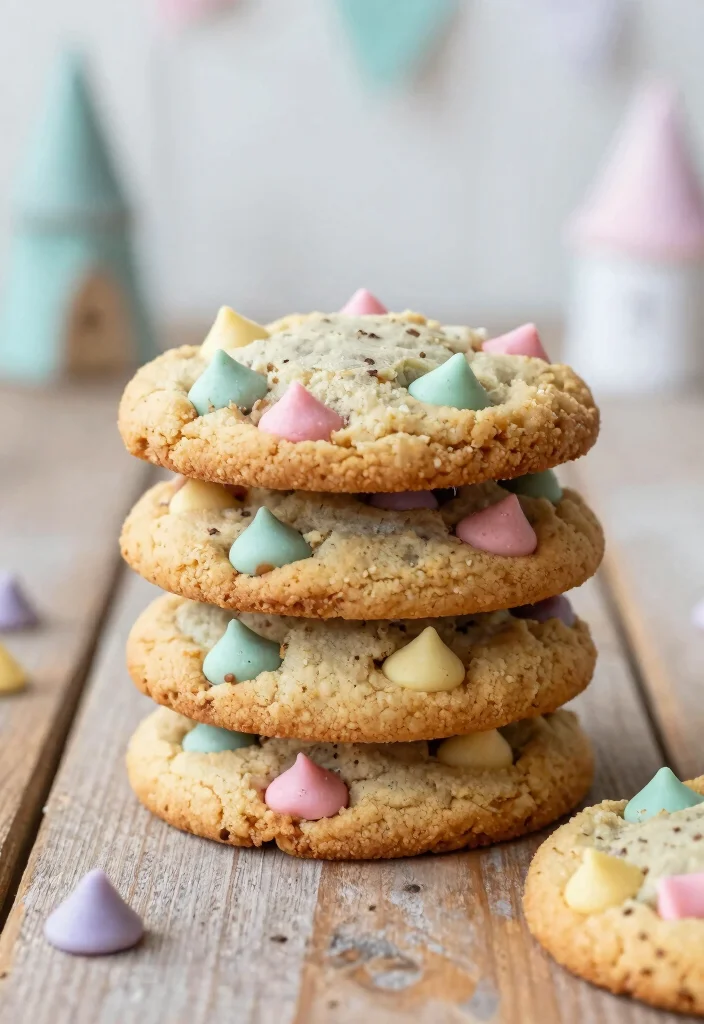
Want to elevate the classic chocolate chip cookie? Fairy tale chocolate chip cookies add a whimsical twist with pastel-colored chocolate chips or colorful sprinkles! These cookies taste heavenly and add a delightful charm to your dessert spread.
Ingredients: – 1 cup unsalted butter – 1 cup granulated sugar – 1 cup brown sugar – 2 eggs – 2 ½ cups all-purpose flour – 1 tsp baking soda – 1 tsp vanilla extract – 1 cup pastel chocolate chips or colorful sprinkles.
Instructions: 1. Preheat your oven to 350°F (175°C) and line a baking sheet with parchment paper. 2. In a large bowl, cream together butter, granulated sugar, and brown sugar until light and fluffy. 3. Beat in eggs one at a time, then stir in vanilla. 4. Combine flour and baking soda in another bowl; gradually add to the creamed mixture, mixing well. 5. Fold in chocolate chips or sprinkles. 6. Drop rounded tablespoons onto the prepared baking sheet. 7. Bake for 8-10 minutes until edges are golden. 8. Cool on wire racks before serving.
FAQs: – Can I freeze the dough? Yes, you can freeze it for later use!
Fairy Tale Chocolate Chip Cookies
Editor’s Choice
Price updated on December 19, 2025 at 5:28 AM
🛍️
Pure Food By Estee Natural Pastel Colors Rainbow Candy Coated “Chocolate…
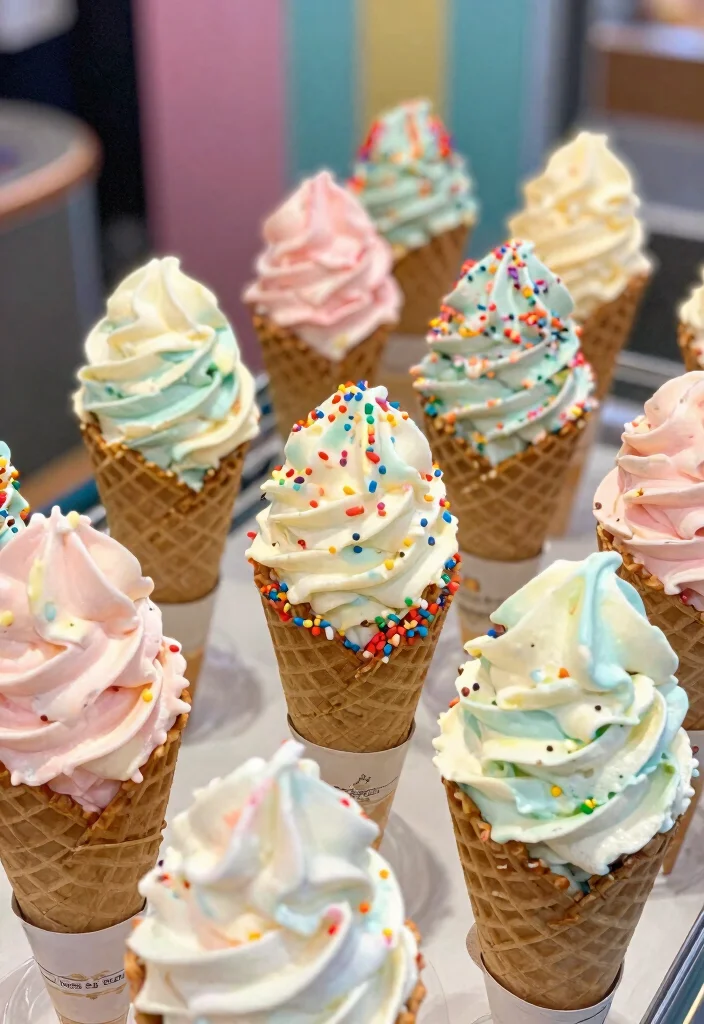
Looking to make your ice cream more enchanting? Magical fairy ice cream cones are a fun way to serve this classic treat! Use pastel-colored ice cream topped with sprinkles, edible glitter, and mini marshmallows for a delightful dessert on a warm day.
Ingredients: – 1 pint of pastel ice cream (like cotton candy or mint) – 6 ice cream cones – Assorted toppings (sprinkles, edible glitter, mini marshmallows).
Instructions: 1. Scoop your choice of pastel ice cream into each cone. 2. Top with a variety of sprinkles, edible glitter, and mini marshmallows. 3. Serve immediately for a delightful treat!
FAQs: – Can I use regular ice cream? Absolutely! Any flavor works.
Magical Fairy Ice Cream Cones
Editor’s Choice
Price updated on December 19, 2025 at 5:28 AM
🛍️
Edible Glitter – 15 Popular Colors Edible Glitter for Cocktails, Food Gr…
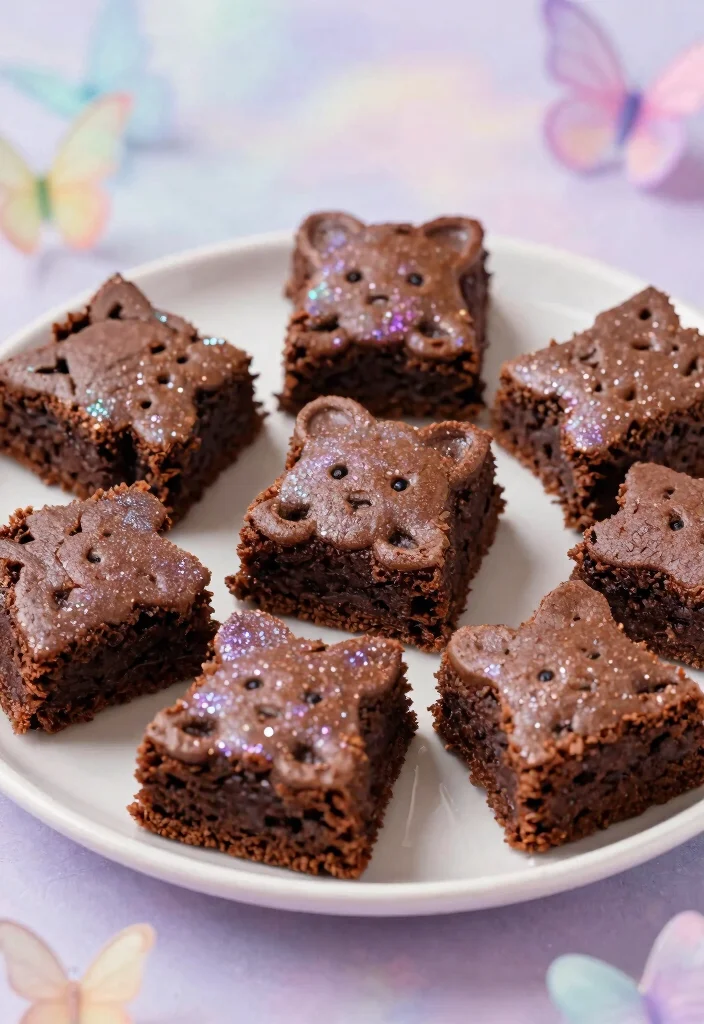
Want to add a touch of magic to your brownies? Shimmering fairy dust brownies are fudgy delights that are easy to make! Bake a simple brownie mix, and after cooling, dust them with edible glitter for an enchanting dessert that looks as good as it tastes.
Ingredients: – 1 box brownie mix – Ingredients required on the box (usually eggs, water, and oil) – Edible glitter for topping.
Instructions: 1. Preheat your oven according to brownie mix instructions and prepare a baking dish. 2. Prepare the brownie batter according to package instructions and pour into the baking dish. 3. Bake for the recommended time until a toothpick comes out clean. 4. Let cool, then cut into shapes with cookie cutters. 5. Dust the top with edible glitter before serving.
FAQs: – Can I freeze brownies? Yes, they freeze well for future treats!
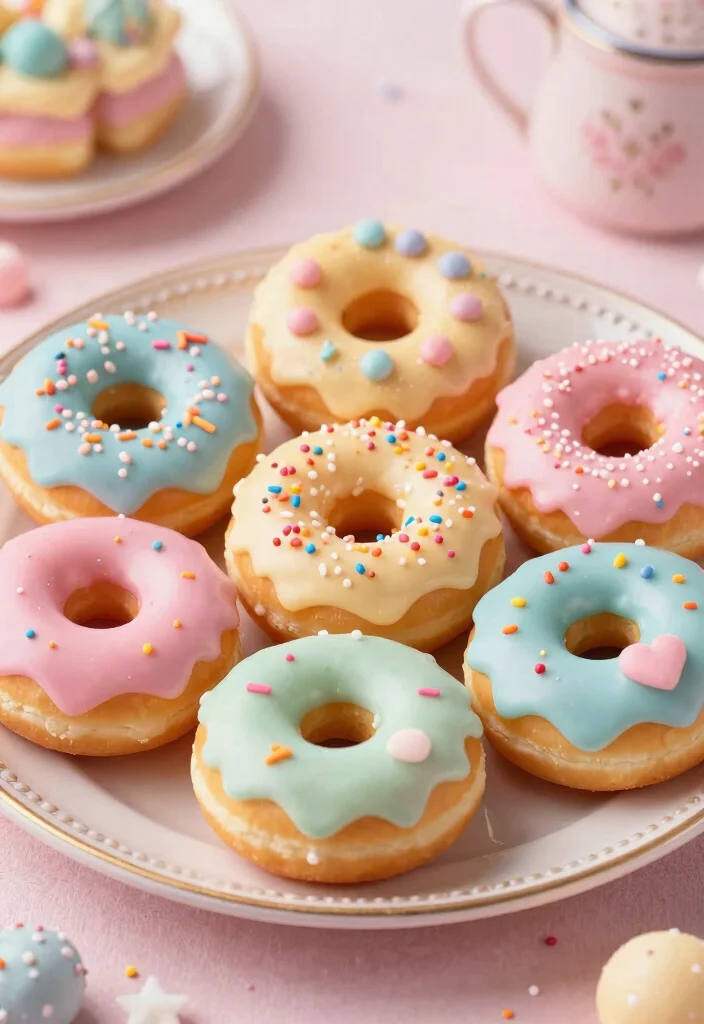
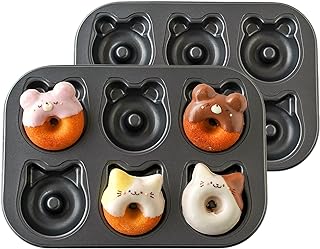
Want to add a whimsical touch to your dessert table? Mystical fairy donuts are a delightful treat that can be baked or fried! Dip them in pastel-colored glaze and top with fun sprinkles and edible glitter for a delicious and enchanting dessert.
Ingredients: – 2 cups all-purpose flour – 1 cup sugar – 1 tbsp baking powder – ½ cup milk – 2 eggs – ½ cup melted butter – Pastel donut glaze (powdered sugar + milk) – Assorted sprinkles.
Instructions: 1. Preheat your oven to 375°F (190°C) and prepare a donut pan. 2. Mix flour, sugar, and baking powder in a large bowl. 3. In another bowl, whisk together milk, eggs, and melted butter. 4. Combine the wet and dry ingredients, then fill the donut pan with the batter. 5. Bake for 15-20 minutes or until golden brown. 6. Let cool and dip in pastel glaze, then top with sprinkles before serving.
FAQs: – Can I use a store-bought glaze? Absolutely! It saves time.
These Mystical Fairy Donuts are the perfect sprinkle of magic for fairy themed desserts. Bake or fry them, then dip in pastel glaze and top with edible glitter—watch crowd reactions turn into wow moments at your fairy-themed birthday party.
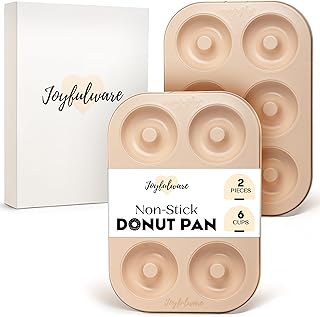
Mystical Fairy Donuts
Editor’s Choice
Price updated on December 19, 2025 at 5:29 AM
🛍️
Donut Pan for Baking – Set of 2 Non-stick Donut Pans – Carbon Steel Doug…
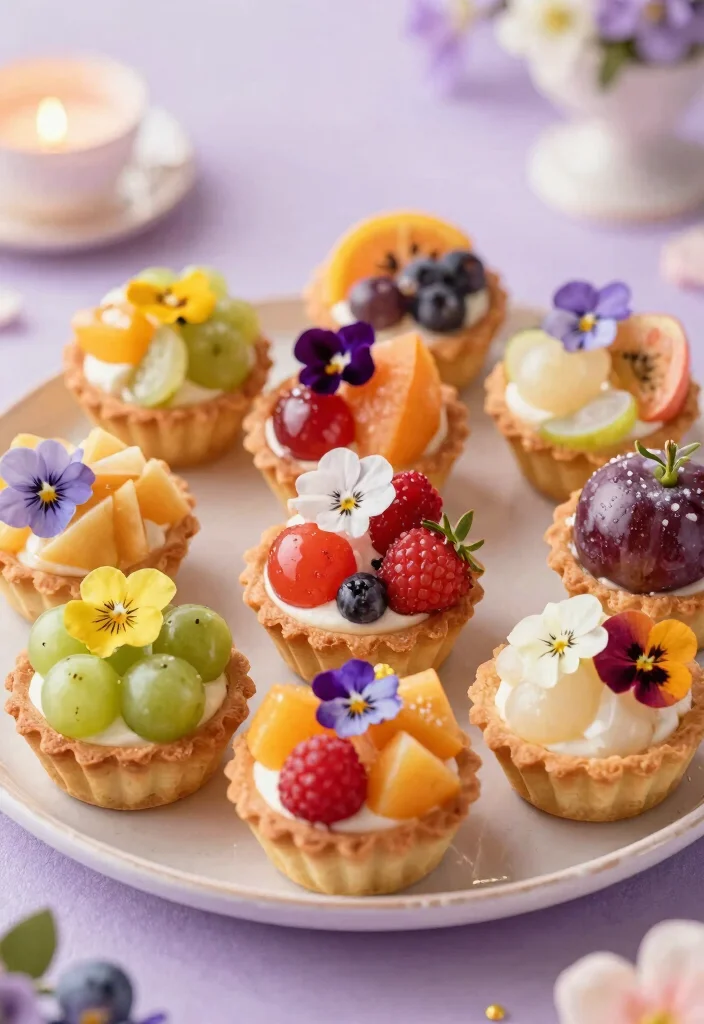
Looking for a stunning yet delicious dessert? Whimsical fairy fruit tarts are simple to make and visually enchanting! Use a basic tart dough filled with pastry cream and topped with colorful fruits, and you’ve created a treat that’s as delightful to eat as it is to behold.
Ingredients: – 1 package tart dough – 2 cups pastry cream (store-bought or homemade) – Assorted fresh fruits (berries, kiwi, mango, etc.) – Edible flowers for decoration.
Instructions: 1. Preheat your oven to 350°F (175°C) and line a tart pan with dough. 2. Bake the tart shells according to package instructions until golden brown. 3. Allow to cool, then fill each shell with pastry cream. 4. Top with assorted fruits and decorate with edible flowers before serving.
FAQs: – Can I make these ahead of time? Yes, assemble them a few hours before serving for the freshest taste.
Whimsical fairy fruit tarts prove dessert can be magical and easy. Fresh fruit, pastry cream, and a spark of edible color turn any birthday into a tiny fairy tale—no fussy tricks needed, just delicious, shareable magic.
Whimsical Fairy Fruit Tarts
Editor’s Choice
Price updated on December 19, 2025 at 5:29 AM
🛍️
Classic All-in-One Tart Pan 9 Inch Removable Bottom Set with Patented Si…
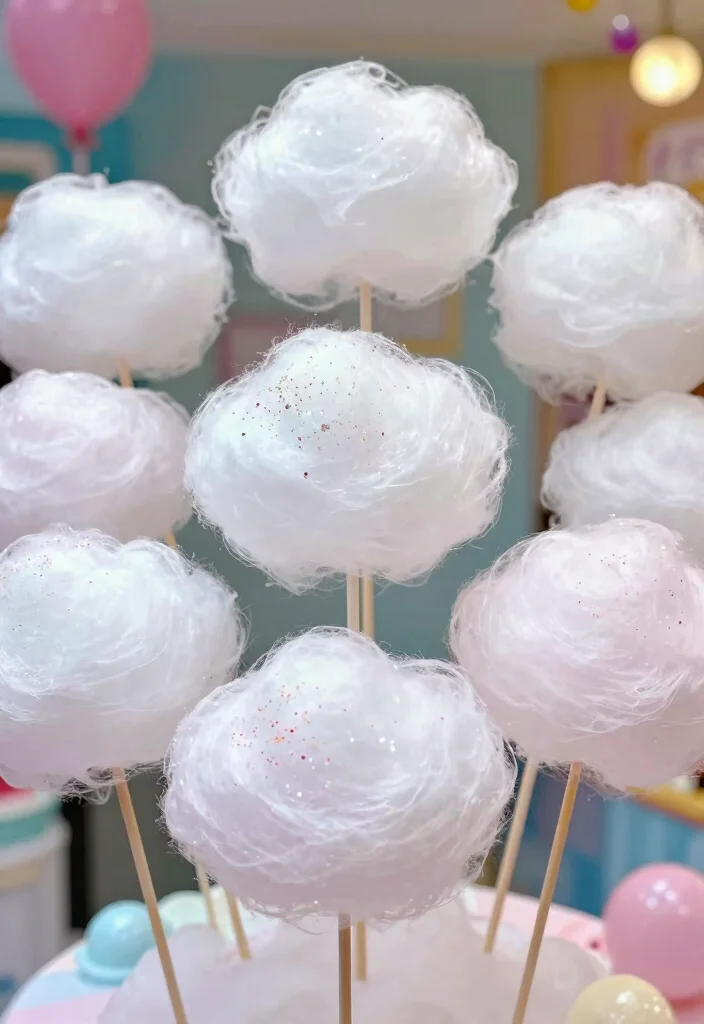
Looking to bring a fairytale essence to your dessert table? Cotton candy clouds are fluffy and sweet, sure to impress guests of all ages! Serve them on a stick and sprinkle with edible glitter for that magical sparkle.
Ingredients: – 1 bag of cotton candy – Edible glitter for sprinkling.
Instructions: 1. If using store-bought cotton candy, pull it into fluffy clouds. 2. Insert skewers into the cotton candy and shape them into clouds. 3. Lightly sprinkle with edible glitter if desired. 4. Serve on a dessert table or individually at a party!
FAQs: – Can I make cotton candy at home? Yes, with a cotton candy machine!
Cotton Candy Clouds
Editor’s Choice
Price updated on December 19, 2025 at 5:29 AM
🛍️
Cotton Candy Machine with LED Lights, Quick Heat-Up, Electric Machine wi…
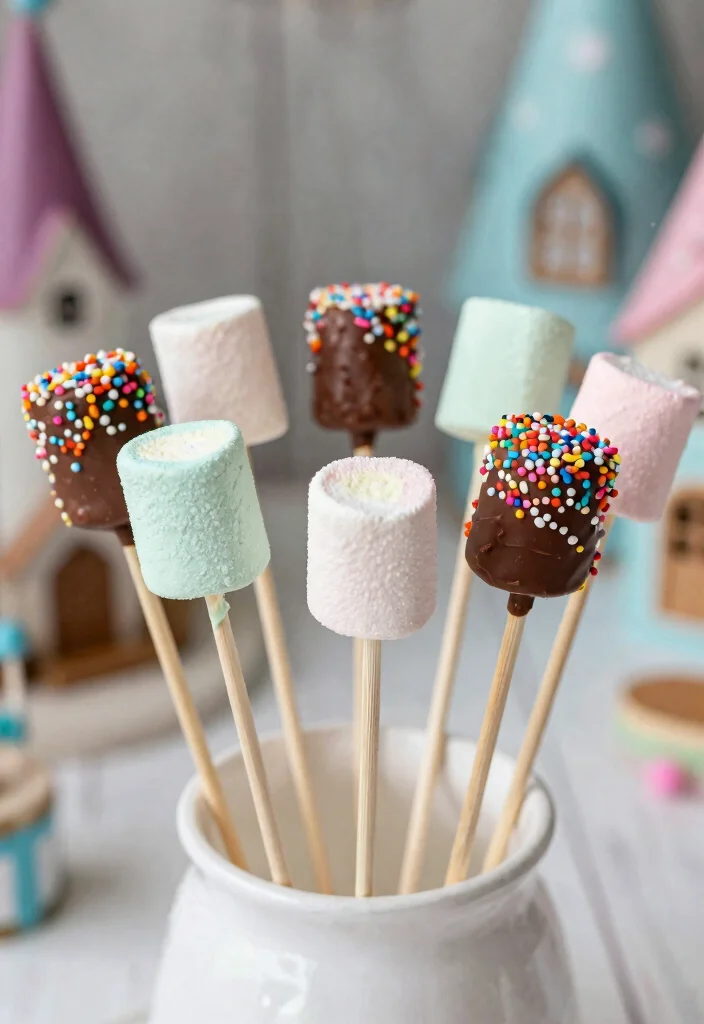
Want to turn ordinary marshmallows into something magical? Fairy magic pops are easy to make and a fantastic addition to your dessert table! Simply dip marshmallows in melted chocolate and coat with colorful sprinkles or edible glitter for a fun, whimsical treat.
Ingredients: – 12 large marshmallows – 1 cup chocolate (dark or white) – Assorted sprinkles or edible glitter.
Instructions: 1. Melt the chocolate in a microwave-safe bowl until smooth. 2. Dip each marshmallow in the melted chocolate, allowing excess to drip off. 3. Roll in sprinkles or edible glitter and place on parchment paper to set. 4. Insert sticks into each marshmallow once set.
FAQs: – Can I use mini marshmallows? Yes, but adjust the coating method accordingly.
Fairy Magic Marshmallow Pops
Editor’s Choice
Price updated on December 19, 2025 at 5:29 AM
🛍️
Wilton Candy Melts Melting Pot, Perfect for Strawberries and Cakepops, 2…
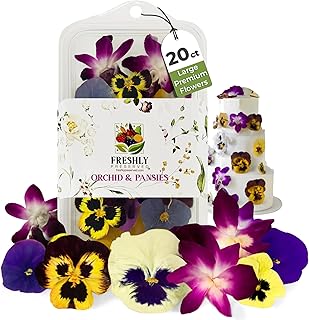
Delight your guests with charming berry shortcakes that capture fairy charm! Fluffy biscuit-like cakes layered with whipped cream and fresh berries create a refreshing dessert. Decorate with edible flowers for an extra whimsical appeal!
Ingredients: – 2 cups all-purpose flour – 2 tbsp sugar – 1 tbsp baking powder – ½ tsp salt – ½ cup unsalted butter (cubed) – 1 cup heavy cream – Mixed berries (strawberries, blueberries, raspberries) – Edible flowers for decoration.
Instructions: 1. Preheat your oven to 425°F (220°C) and line a baking sheet. 2. Mix flour, sugar, baking powder, and salt in a large bowl. Cut in butter until the mixture resembles coarse crumbs. 3. Stir in cream until just combined. 4. Shape the dough into 1-inch thick rounds and place on the baking sheet. 5. Bake for 15 minutes. Let cool, then slice in half and layer with whipped cream and berries. 6. Top with edible flowers before serving.
FAQs: – Can I make the shortcakes ahead of time? Yes, but assemble them just before serving for the best texture.
Whimsical Berry Shortcakes
Editor’s Choice
Price updated on December 19, 2025 at 5:29 AM
🛍️
MILLIN Cocktail Garnish Gift Set – Edible Flowers & Dehydrated Fruits | …
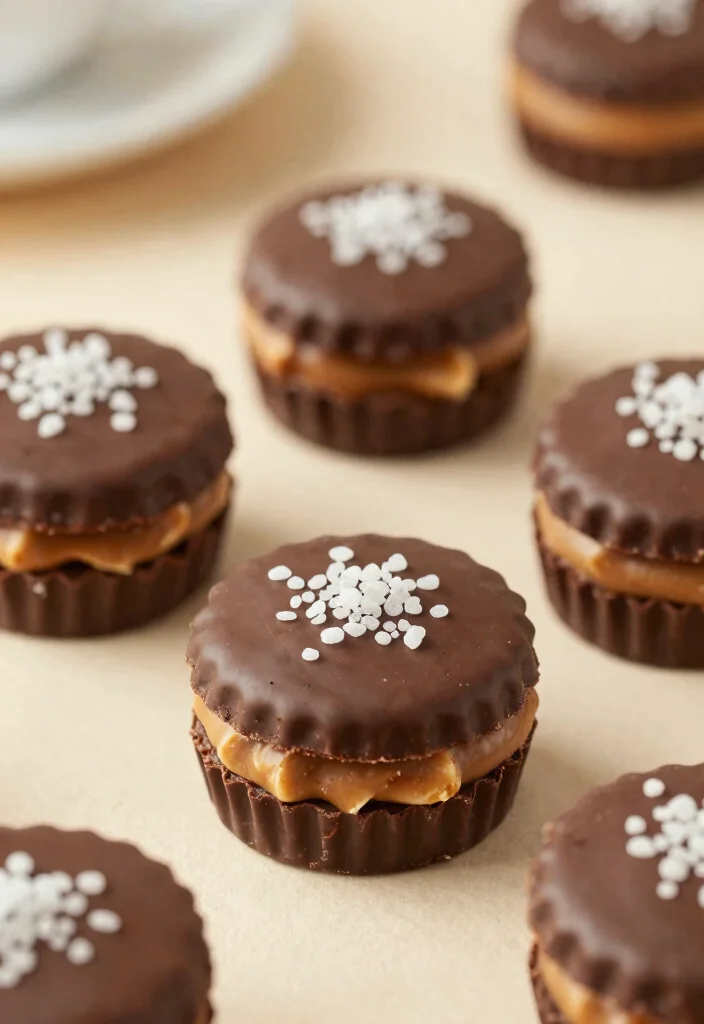
Craving a nutty indulgence? Fairytale peanut butter cups are a must-have for any chocolate lover! Layer melted chocolate with creamy peanut butter and a sprinkle of sea salt for a delightful contrast of flavors that adds a whimsical touch to your dessert spread.
Ingredients: – 1 cup milk chocolate chips – 1 cup creamy peanut butter – Sea salt for sprinkling.
Instructions: 1. Melt chocolate chips in a microwave-safe bowl until smooth. 2. Line a muffin tin with cupcake liners and pour a thin layer of melted chocolate into each liner. 3. Freeze for about 10 minutes until set. 4. Add a layer of peanut butter on top of the chocolate, then cover with more melted chocolate. 5. Freeze again until completely set, then sprinkle with sea salt before serving.
FAQs: – Can I use crunchy peanut butter? Yes, it adds a nice texture!
Looking for a refreshing treat to brighten up your dessert table? Twinkling fairy sorbet can be made from any fruit puree, making it both delicious and versatile! Serve it in cute cups topped with edible glitter for that magical touch.
Ingredients: – 2 cups fruit puree (strawberries, mango, or peach) – 1 cup sugar – 1 cup lime juice.
Instructions: 1. In a blender, combine fruit puree, sugar, and lime juice until smooth. 2. Pour the mixture into a shallow dish and freeze for about 4 hours, scraping every hour with a fork to create fluffy textures. 3. Serve in cups and top with edible glitter.
FAQs: – Can I use frozen fruit? Yes, just thaw it before blending!
Twinkling Fairy Sorbet
Editor’s Choice
Price updated on December 19, 2025 at 5:29 AM
🛍️
Edible Glitter – 15 Popular Colors Edible Glitter for Cocktails, Food Gr…
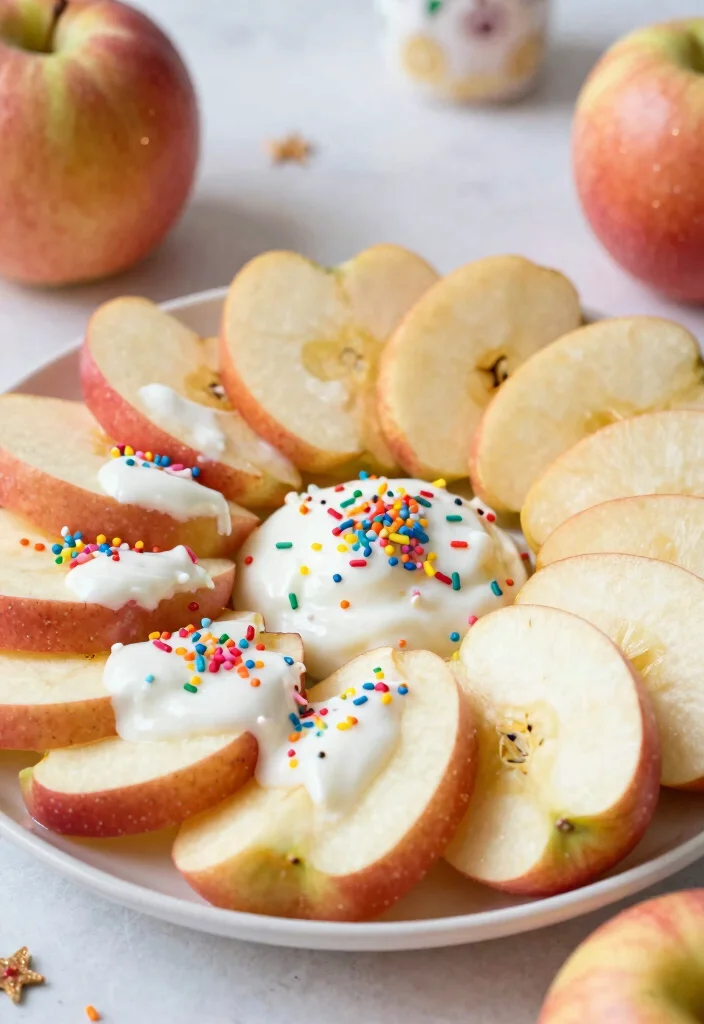
Want a fun and healthy treat for your fairy-themed party? Enchanted apple slices are perfect for kids and adults alike! Dip apple slices in yogurt and coat with colorful sprinkles or crushed nuts for a magical finish that’s delightful to look at and eat.
Ingredients: – 2 apples (your choice of variety) – 1 cup yogurt (any flavor) – Assorted sprinkles or crushed nuts.
Instructions: 1. Wash and slice apples into wedges. 2. Dip each apple slice into yogurt and coat with sprinkles or nuts. 3. Arrange on a platter and serve immediately.
FAQs: – Can I use peanut butter instead of yogurt? Yes, it adds a delicious twist!
Enchanted Apple Slices
Editor’s Choice
Price updated on December 19, 2025 at 5:29 AM
🛍️
NEW Professional Apple Slicer and Corer 6.42in- Stainless Steel Apple Cu…
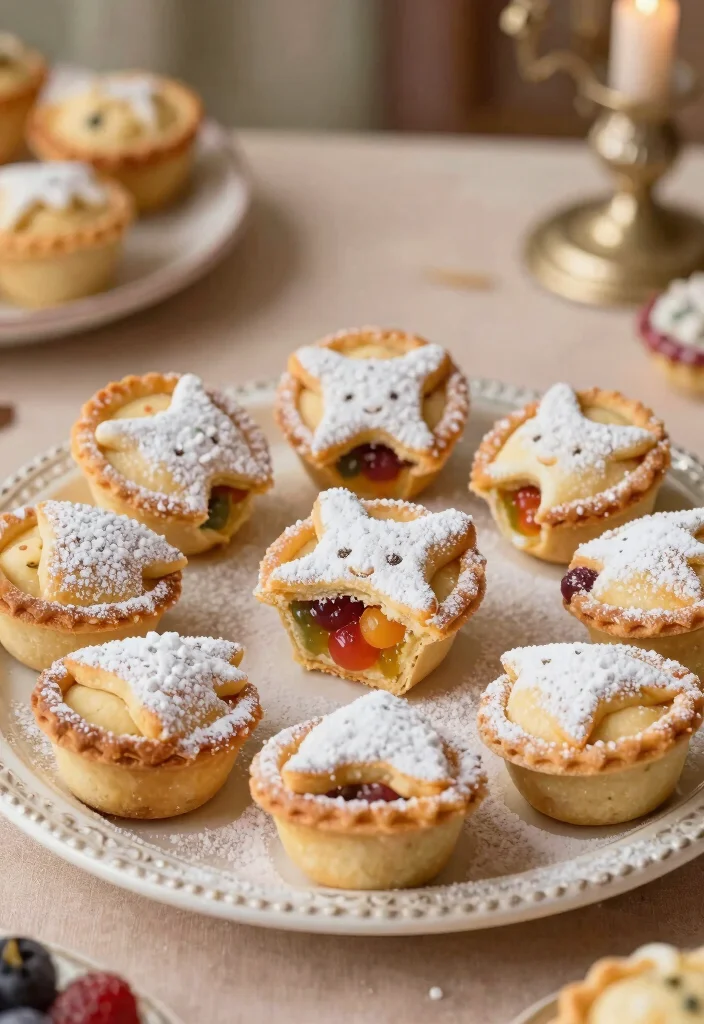
Looking to add some magic to your dessert table? These mini fairy pies are delightful surprises for your guests! Use pre-made pie crusts filled with sweet fillings like fruit jams or chocolate ganache, cut into fun shapes, and sprinkle with powdered sugar for a treat that’s simply enchanting.
Ingredients: – 1 package pre-made pie dough – 1 cup fruit jam or chocolate ganache – Powdered sugar for dusting.
Instructions: 1. Preheat your oven to 375°F (190°C) and prepare a baking sheet. 2. Roll out the pie dough and cut into fun shapes using cookie cutters. 3. Spoon a small amount of filling onto half of the shapes, then top with another shape and seal the edges. 4. Bake for 20 minutes or until golden brown. 5. Dust with powdered sugar before serving.
FAQs: – Can I freeze these pies? Yes, they freeze well before baking.
Whimsical Fairy Pies
Editor’s Choice
Price updated on December 19, 2025 at 5:29 AM
🛍️
BAKERLOGY Set of 2 Cute Fairy and Fairy Door Cookie Cutter – Detailed Bi…
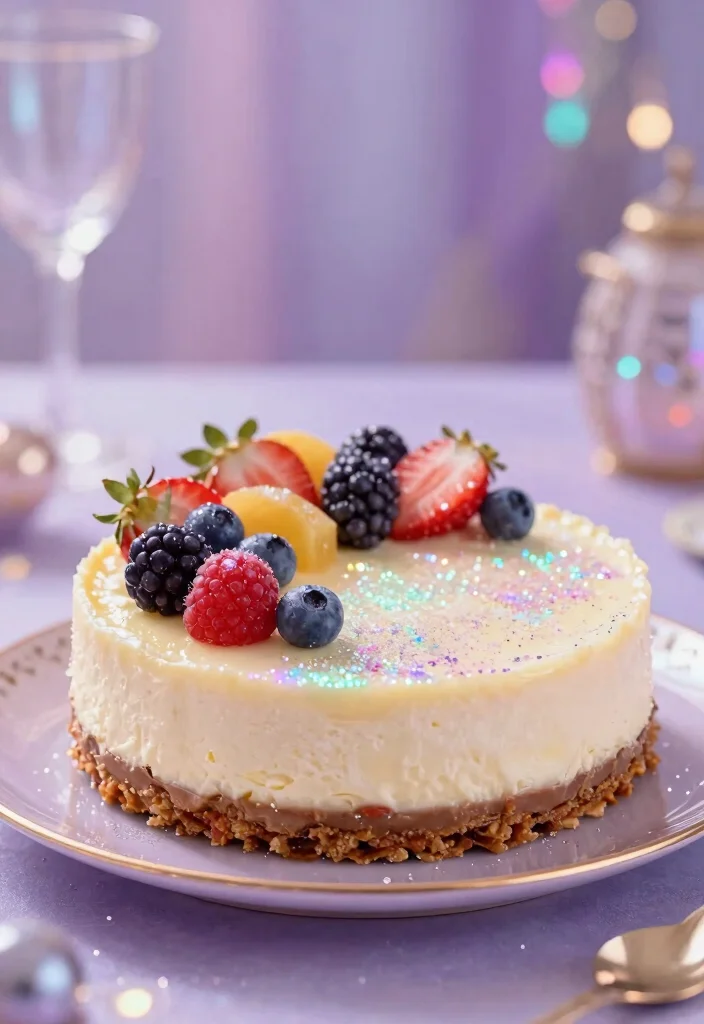
Want to end your magical feast with a show-stopping dessert? Sparkling fairy cheesecake features a creamy filling on a graham cracker crust, adorned with layers of fruity glaze. Decorate with edible glitter and fresh fruits to create an enchanting centerpiece that captures the essence of a fairy tale.
Ingredients: – 1 ½ cups crushed graham crackers – ½ cup sugar – ½ cup unsalted butter, melted – 4 packages (8 ounces each) cream cheese – 1 cup sugar – 4 eggs – 1 cup sour cream – 2 cups assorted fruit (berries, kiwi, etc.) – Edible glitter for decoration.
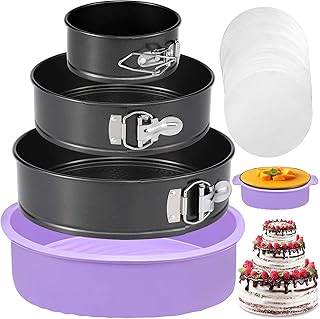
Instructions: 1. Preheat your oven to 325°F (160°C) and prepare a springform pan. 2. Mix graham cracker crumbs, sugar, and melted butter until combined, then press into the bottom of the pan. 3. In a mixer, beat cream cheese and sugar until smooth; add eggs one at a time. 4. Stir in sour cream and pour over the crust. Bake for 60 minutes or until set. 5. Let cool in the fridge before topping with fresh fruit and edible glitter.
FAQs: – How long does it last? Store in the refrigerator for up to a week.
Sparkling Fairy Cheesecake
Editor’s Choice
Price updated on December 19, 2025 at 5:30 AM
🛍️
Boxiki Kitchen 10 Inch Nonstick Springform Pan, Professional Spring Form…
Create Sparkling Fairy Cupcakes with edible glitter to add a touch of enchantment to your party treats.
🍭
QUICK WIN
Fruit Wands Delight
Craft Fairy Fruit Wands by skewering colorful fruit pieces for a healthy and whimsical dessert option.
🍰
PRO TIP
Layered Parfait Fun
Make Fairy Garden Pudding Parfaits with layers of pudding and crushed cookies for a magical visual effect.
🌈
ESSENTIAL
Rainbow Treats
Incorporate Rainbow Fairy Licorice to add vibrant colors and flavors to your dessert table, appealing to all ages.
🍦
BEGINNER
Ice Cream Cones
Serve Magical Fairy Ice Cream Cones topped with sprinkles to delight guests with a fun and tasty treat.
🌟
ADVANCED
Advanced Chocolate Bark
Create Enchanted Chocolate Bark by layering colored chocolate and toppings for an impressive, shareable dessert.
Conclusion
Planning a fairy-themed birthday celebration can be a delightful adventure filled with sweet treats that transport your guests to a magical world. The 25 enchanting fairy-themed desserts highlighted here are sure to impress and create unforgettable memories at your party. From cupcakes to tarts, each recipe offers a unique touch of whimsy and charm. So gather your ingredients, sprinkle some fairy dust, and let your imagination run wild as you prepare for a truly magical birthday party experience!
Don’t forget to share your creations and inspire others to embrace the enchantment of fairy-themed desserts!
Note: We aim to provide accurate product links, but some may occasionally expire or become unavailable. If this happens, please search directly on Amazon for the product or a suitable alternative.
This post contains Amazon affiliate links, meaning we may earn a small commission if you purchase through our links, at no extra cost to you.
Frequently Asked Questions
What Are Some Must-Try Fairy Themed Desserts for a Magical Birthday Party?
Kick off with crowd-pleasers like fairy themed desserts such as fairy-wing cupcakes, shimmering jelly cups, and sugar-dusted shortbread stars. For a cohesive spread, pick 2–3 treats in the same color family and arrange them on a whimsical tray to boost the magical birthday vibe. Add edible glitter, tiny fondant wings, and sugar flowers to keep the look enchanting without fuss. This approach makes your party feel like a page from a storybook, perfect for crafting whimsical treats into real desserts.
How Can I Decorate Fairy Themed Desserts to Look Enchanting Yet Simple?
Stick to a soft pastel color palette and use edible glitter, sugar flowers, and fondant wings to elevate fairy themed desserts. Create easy toppers with cookie cutters for leaf shapes or mushroom caps and place them on a mossy-looking base made from fondant or coconut. Use a couple of simple piping techniques to add delicate lines and sparkles, keeping it approachable for home bakers working on a magical birthday party. Your whimsical treats will shine without needing hours of advanced decorating.
Are There Dairy-Free or Allergy-Friendly Fairy Desserts?
Absolutely. You can whip up dairy-free frosting with vegan butter or coconut cream, and swap cow’s milk for almond or oat milk in any recipe. Choose gluten-free flour or oat flour for cookies, and use fruit-based jellies or agar to create glow cups, ensuring all ingredients are clearly labeled for allergies. These options let you enjoy fairy themed desserts at a magical birthday celebration without compromising taste or safety. Remember to check labels and share ingredient lists with guests.
How Far Ahead Can I Prepare Fairy Desserts for a Magical Birthday Party?
Plan ahead by baking cupcakes or cookies 1–2 days before the party and freezing them if needed, then frost and decorate on the day of the event. Prepare frostings and fillings in advance and keep them refrigerated until you’re ready to assemble. For best freshness, assemble delicate decorations like wings or sugar flowers the day of the party, but you can create toppers and edible glitter accents in advance. With this approach, your magical birthday dessert spread stays fresh and stress-free.
What Budget-Friendly Tools Help Create Whimsical Fairy Desserts at Home?
You don’t need a huge budget to wow guests. Essential tools include a few piping tips and bags, silicone molds for fairy wings or mushrooms, cookie cutters, fondant tools, edible glitter, gel food colors, and a small food-safe brush for detailing. Repurpose kitchen items like silicone molds, cupcake liners, and parchment sheets to stretch your budget while keeping things neatly displayed as fairy themed desserts. Look for multipacks and buy basics in neutral colors so you can mix and match for a whimsical treats display at your magical birthday party.
Hi, I’m Elena — the heart behind MomBlush. I created this space to share the gentle, honest, and often emotional journey of motherhood. From pregnancy and postpartum moments to newborn care and everyday mom-life lessons, I write from a place of real experience and real love.
Every article is my way of reminding another mom that she isn’t alone, that her feelings are valid, and that she’s doing an incredible job — even on the messy days. MomBlush is where I pour my thoughts, learnings, and little discoveries, hoping they bring comfort, confidence, and a smile to your day.
Did you know that the tradition of birthday cakes goes back to ancient Greece? They would make round cakes to celebrate the moon goddess! These desserts would definitely make any celebration feel extra special.


![[Upgraded] Newness 5.12 Inch Large Apple Slicer, Cut 16 Thin Slices All ...](https://m.media-amazon.com/images/I/61vUx2beMPL._AC_UL320_.jpg)


Did you know that the tradition of birthday cakes goes back to ancient Greece? They would make round cakes to celebrate the moon goddess! These desserts would definitely make any celebration feel extra special.